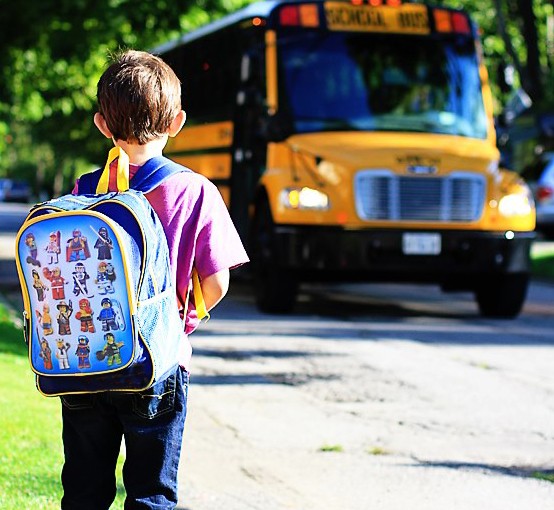
Preventing Bullying on the School Bus

About a third of students ages 12 to 18 in the United States reported being bullied, according to the Department of Education. Children who are bullied experience depression and anxiety, reduced self-esteem, changes to eating and sleeping patterns, and decreased academic achievement.

But the negative impacts of bullying don’t stop there. Bystanders who witness bullying are at increased risk of drug and tobacco use, have increased risk for depression and anxiety, and are more likely to skip school. Bullies are more likely to abuse drugs, engage in earlier sexual activity, drop out of school, and abuse their spouses, children and others later in life.

Bullying is a serious issue that impacts everyone involved. Addressing it early and working to create a bully-free environment can positively change students’ lives.

Where Bus Drivers Fit in to Stop Bullying

Bullying isn’t limited to the classroom or the schoolyard. Of those who reported bullying, 8 percent said the bullying took place on a school bus.

According to a survey of education support professionals (ESPs) by National Education Association (NEA), bus drivers consider bullying to be a bigger problem than many of their ESP peers. Bus drivers are more likely than other ESPs to witness bullying, and many said they witnessed it several times a month.

What’s more, even when bullying did not occur on the bus, bus drivers were 36 percent more likely to receive reports of bullying, from both students and parents.

Clearly, bus drivers have a significant role to play in creating an environment that does not tolerate bullying. And according to the survey, they’re ready to step up: 92 percent of bus drivers surveyed indicated they feel it’s their responsibility to intervene when they witness bullying.

And yet, while most drivers were aware their school districts had bullying policies in place, 56 percent said they had received no training on it. In fact, more than two-thirds of bus drivers expressed they would like more training on how to address various bullying scenarios.

NEA recommends bus drivers take advantage of online training courses, and ask their school district for training on current bullying intervention and prevention policies.

Here are some tips to set a foundation for a safe, bully-free bus:

Intervening with Bullying

  • Maintain an assertive and calm demeanor
  • Start with verbal warnings, using the name of the student doing the bullying
  • If the behavior continues, call the school or dispatcher to report it
  • If you feel you must, stop the bus to address the situation
  • Never argue with a student who is bullying, or try to convince them
  • Move affected students to new, safe seats
  • Talk to other school staff about the incident

Preventing Bullying

  • Establish a positive environment on the bus by being clear, fair and consistent about rules
  • Learn students’ names and get to know them (even students who bully). Introduce yourself to them so they know yours, too.
  • Notice when students do something positive, and recognize them for it
  • Submit positive bus referrals

Together, we can work toward a bully-free environment

Bullying is a serious problem that has serious consequences for all who are involved. But by working together to establish a safe and positive school experience for all children in every space they inhabit, we reduce bullying and work toward bully-free educational environments.

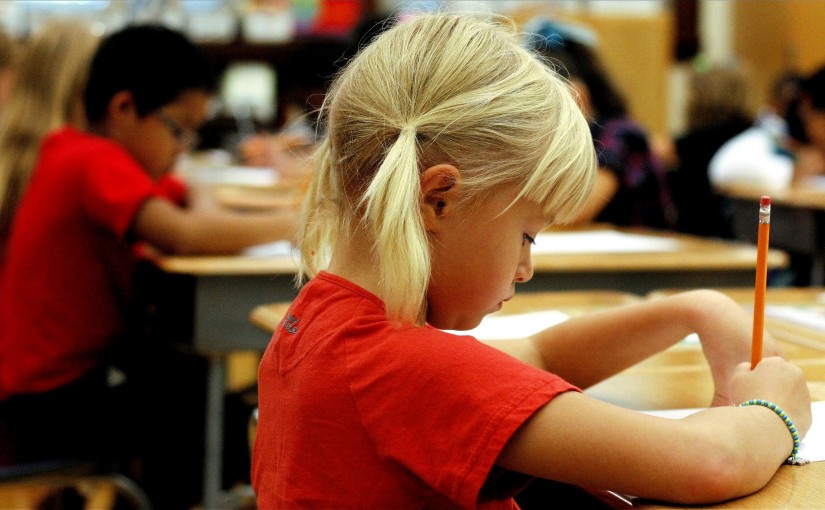
Identifying Different Types of Learners

There are many different ways that people learn, and in any classroom, you are bound to encounter several students from each learning category.  While one method of teaching may work very well for a certain type of learner, another type may not respond at all to what you try.  As a new teacher, it is very important to learn how to identify the different types of learners in your classroom, and then to make sure that each one of your lessons takes into account every style of learning that your students may need.  To become an effective teacher, you must anticipate the needs of your students and tailor your lesson plans to best benefit each type of learning your classroom.


Auditory Learners

In the past, most styles of education relied on the belief that all students were auditory learners.  This has, of course, since been proven incorrect, so you should never rely solely on auditory teaching methods to reach your class.

Auditory learners focus best on verbal, spoken language, but may struggle with the written word and with hands-on projects.  While listening to information over and over again can help an auditory learner remember much more easily, the same student may get nothing out of reading a chapter silently out of a book.  These students are easy to identify, even as a new teacher, because they tend to be the most outgoing students in the classroom.  They may be social butterflies who enjoy talking and hearing themselves talk, and they tend to be class clowns who always seem to be at the center of attention.


Visual Learners

Visual learning focuses on the interpretation and absorption of taught information by seeing and processing it.  Visual learners are slightly less common than auditory learners, but still may comprise the majority of your classroom.

A student who learns best visually does well at quiet reading time, and can learn material from watching movies as well.  The same student may struggle with directions that are given verbally, and may not do very well when trying to construct something by hand.  Visual learners can be identified by their strong attention to detail and need to be organized, even at a young age.  These students are good at one-on-one conversation, but may not be part of a larger group, and may be much quieter than their auditory counterparts.  Noise often distracts a visual learner, and these students may need you to physically perform a task before they can repeat it.


Kinesthetic Learners

Although kinesthetic learners are not quite as common as auditory and visual learners are, they are still common enough that you are sure to encounter a handful even in your first class.  They may be more challenging to teach, but if you are prepared you should not have any trouble.

Kinesthetic learners are best suited to learning by doing.  These students retain information when they are able to manipulate objects or understand information by interacting with parts of it.  They may not do well when given verbal direction or shown how to do something, but instead want to dive in and try it on their own.  You can identify a kinesthetic learner in your classroom by pinpointing the students who cannot seem to sit still while you are teaching them.  Gain their attention by providing lots of hands-on class experiences.


Identifying and teaching different learning types in your classroom does not have to be a difficult achievement.  Simply keep these tips and strategies in mind, and you will be well on your way to successful teaching in no time.

The Good Teacher’s Guide

A child’s education is nothing without a quality teacher to provide it.  But just what makes a good teacher?  What are the characteristics that all teachers should strive toward in order to have the biggest influence on their students?  Read on to learn all about the ways in which a teacher can go from being simply  a teacher to becoming a good, effective teacher.


Use Understandable Objectives and Goals

Every teacher needs a lesson plan, but if that plan is complicated, confusing, or does not seem to have an endgame in mind, it is useless.  Teachers often fall into the trap of teaching scattered subjects from all over the place, when in reality, a good teacher is one who can focus his or her time and energy and cover every subject in a sequential order.  In the same way, a teacher must provide consistent feedback through grades and notes.  The grading policy should not change in the middle of the year.


Engage While Teaching

Many teachers feel that all they have to do is stand in front of a class, give a lecture, ask a few questions, and move on.  This is one way to dispense information, but it is not a viable method of teaching successfully.  Students get bored with this type of instruction very quickly, and they do not retain much of the information provided if they are not engaged.  Ask students to look at facts that have presented and come up with their own conclusions.  Keep questions open-ended whenever possible, and be sure to call on students equally without returning to one or two favorites.


Know What You Teach

A great teacher must be an expert in his or her field of education.  If you teach science but cannot explain the difference between a proton and a neutron without looking it up, your students are going to lose faith in you quickly, and you will not be able to reach them.  To be a good teacher, you must be able to answer basic questions about your subject at the drop of a hat, and you should be prepared for students who want to study the topic more in-depth.  If you are good at what you teach, and you teach what you know, you are bound to make a connection with a few students who want to go on to focus on your field as well.


Talk To Parents

It may be daunting to try to communicate with parents, but this is a very important part of any good teacher’s job.  Schools usually require parent-teacher conferences at least twice per semester, but it can be beneficial to you and your students as well if you send home letters explaining how the student is doing throughout the year, or even reach out with a phone call if your school allows it.  If you are worried about how a student is doing, talk to the parents.  They will be pleased, and you will be better equipped to help that student succeed.


It does not take much to be a good teacher, and anyone can do it, but you may need to re-evaluate your methods in order to reach that goal.  Do not be afraid to try new things, to talk to parents and engage students, and to be sure you are well equipped to teach your subject matter.  If you follow these few tips, you will be well on your way to being an excellent teacher in no time.

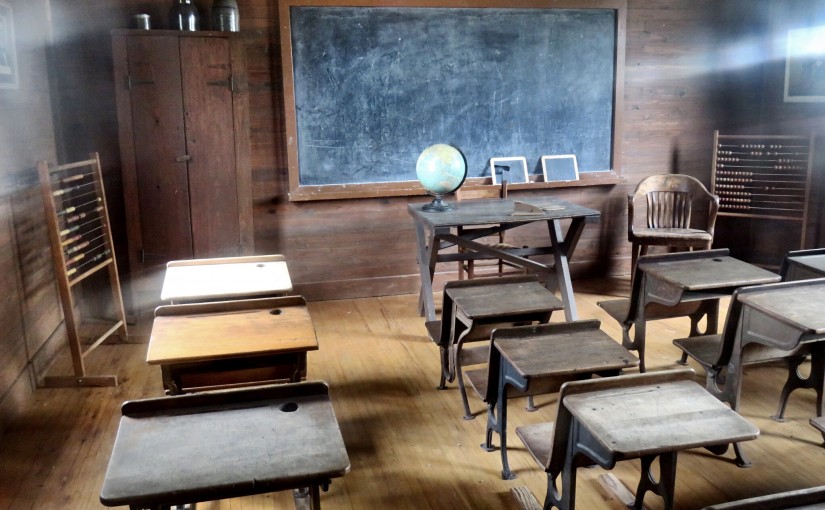
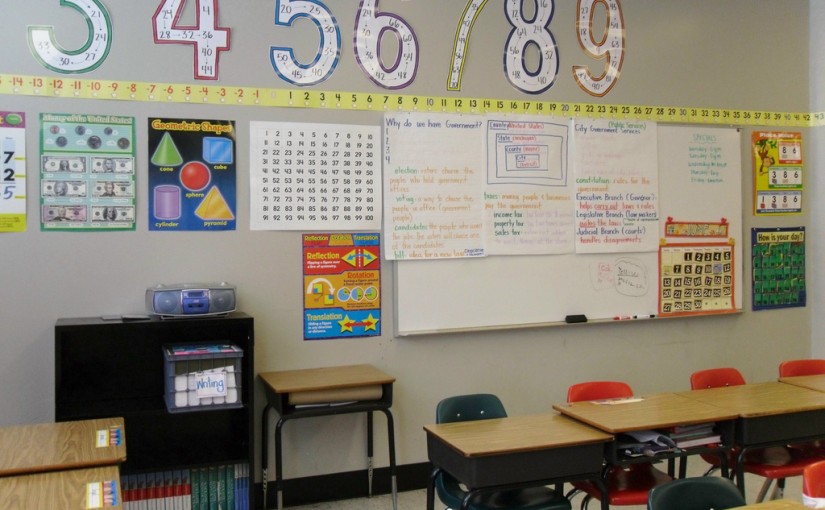
Traditional Education: Does ‘later’ always mean ‘greater’?

Traditional education is, at its core, the most commonly practised form of education throughout much of the world.  This term refers to a back-to-basics way of teaching, where a single instructor (or perhaps an instructor with an aide, for larger classes) speaks to a group of students who are seated at desks or tables.  This teacher-driven type of education has been called into question in recent years, with some groups hoping to reform the educational system and provide students with a task-oriented learning environment that is not so rigidly structured.  This means that teachers must rethink their strategies and try to determine where they and their methods fall in the world of new education reform.


“Old School” Educational Methods

For a long time, education has been centered around traditional “old school” methods of providing students with information.  To this day, several of these methods are still used in the classroom, but they are becoming much less commonplace.  For example, English and vocabulary lessons are no longer based on the study of root words and phonics, as they once were.  Students of the past learned new vocabulary words by identifying their roots and thinking about where they could have come from.  The word “questionable,” for example, has a root word of “question,” which can lead a student to make a good guess as to what the word means.

Math, too, was once taught much differently than it is today.  Students were required to memorize their times tables when they learned multiplication, and classrooms were filled with math pupils who recited, in unison, simple multiplication based on number families.  Some schools even went so far as to have students write their times tables by hand over and over again to ingrain the information into their minds.

Even handwriting has fallen to the wayside and is no longer explored in the classroom the way it used to be.  Students are no longer taught cursive writing at all, save for in certain private schools, and penmanship is not a subject that is graded by teachers any longer.  Students are allowed to write in whatever hand they develop, so long as it is somewhat legible by the teacher.


New Methods of Teaching

There are many ways in which teachers are moving from these traditional, teacher-centered ways of presenting students with information and into a more hands-on, student-driven educational environment.  Perhaps the largest of these new methods is student engagement.  This refers to a teacher giving students basic information and then engaging them in a conversation about the subject matter.  Students learn analytical skills by thinking about the facts they have been given and working toward understanding why things happen the way they do, and how the information pertains to them and their personal lives.

Engagement also refers to giving students hands-on experience in any given subject.  Field trips are much more common in an engagement-driven classroom, and students visit locations where they can watch real world applications of the subjects they learn in school.  Even a local business office can be a great field trip location for students who want to see how math, communication, or other subjects can affect their adult lives.

Some teachers are beginning to adopt a concept called spaced learning for information presentation in the classroom.  This works with the short attention spans of today’s students by combining a small amount of rote memorization with plenty of fun activities to keep the brain moving.  In a spaced learning classroom, a teacher sets aside about an hour to an hour and a half of class time to focus on a subject.  The information is taught to the students first for about fifteen minutes, in a condensed format.  Students then break for a physical activity that lasts ten minutes, before returning to hear the same information repeated in the same order for another fifteen minutes.  The ten-minute physical activity break is repeated, and finally, the fifteen minutes of information is repeated once more to solidify the learning experience.

Spaced learning may seem a little strange at first, but it is a great way to keep students interested in the topic at hand by providing them frequent mental breaks.  The repetition of the information helps keep the subject fresh in their minds, and the physical activity keeps them from getting bored and losing focus.


Why Should Teachers Be Current?

It is very important for teachers to remain up to date with current trends in educational practices.  Prepared teachers who are willing to try new methods of helping students learn are some of the greatest teachers out there, and the results from their classrooms will surely prove that.  Continuing education courses as well as lectures from successful teachers can provide plenty of opportunity for educators to learn about new methods for their own classrooms.  As society and children change throughout the years, the needs of students and their ability to focus and pay attention also changes.  It is vital for teachers to be ready to combat these changes with a dynamic strategy for their lessons.

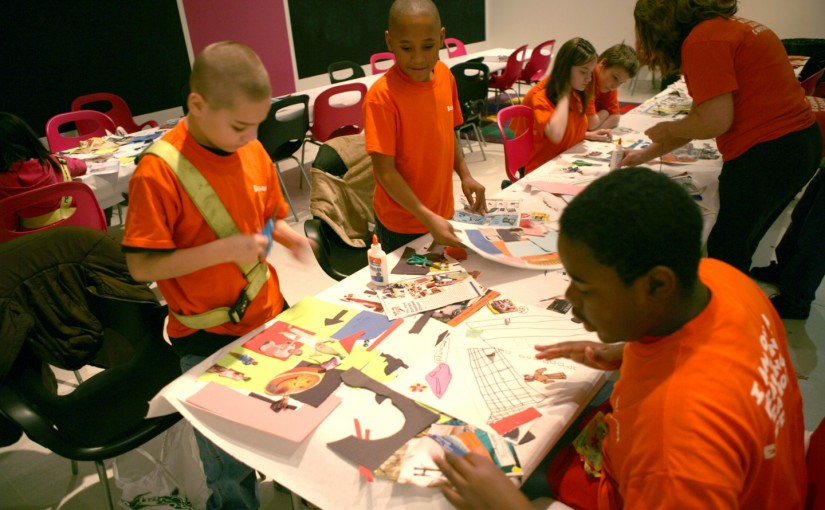
60 Class Projects for Art Teachers

It is well known among teachers that children respond well to art. Whether they are simply looking at it, learning about it or creating it, using art in the classroom is a fantastic way to get kids engaged and offers many benefits for their development.

According to studies, children who regularly participate in art are more likely to achieve academically, and are more likely to score higher marks in standardized testing. Studies also show that children enjoy coming to school to participate in art lessons as they enjoy the hands on focus of art lessons and producing pieces which they can take home and show off.

Art offers a very tangible sense of achievement for children –they learn the skills required, study the techniques and then produce something which demonstrates what they can do, to their audience (usually parents or grandparents). It helps to build confidence and encourages students to think positively about their education and about what they are capable of doing. Art is also a fantastic way to foster creativity in children young and old and helps them to develop their critical thinking skills as they learn to observe, analyse and synthesize the world through an artistic lens.

Statistically, engagement in art is linked to higher test scores, lower drop-out rates at high school level and increased engagement with their community as an adult. Even if you are not an artistic person, or you are teaching a group of students who are not particularly artistic, you should still consider integrating some art into your classroom. Using art can liven things up and expose your students to character building experiences.

Depending on the level of your students, you may want to try offering a variety of lessons using different mediums.

Here is our list of 60 different art lessons for your classroom.  Try making:

• Nature collages
• Portrait sketches
• Cartoon strips
• Shoe-box puppet theaters
• Finger paintings
• Scrapbooks
• Painting of fruit or vegetables
• Mobiles
• Fairy gardens in an ice cream container
• String art
• Melted crayon art
• Dyed pasta jewelry
• Homemade snow globes
• Paper snowflakes
• Origami
• Paper Mache’
• Paper lanterns
• Paper chains
• Yarn Easter eggs
• Potato stamped paper or fabric
• Decorated newsprint for personalized gift-wrap
• Sock puppets
• Salt dough pinch pots
• Christmas wreaths
• Paper dolls with split pins
• Christmas cookie ornaments
• Homemade greeting cards
• Dyed Easter eggs
• Paper beads
• Clay masks
• Painted national flags
• Create or color in coloring pages
• Picture frames from card
• Fingerprint trees
• Weaved paper coasters
• Button art
• Yarn wrapped letters
• Paint chip bookmarks
• Tie Dyed shirts
• Cups decorated with a sharpie
• Leaf paintings
• Coin rubbings
• Rock paintings
• Geometric drawings
• Foil art
• Paper plate masks
• Puffy paintings
• Bird feeders
• Painted pinecones
• Surrealist glue art
• Mixed media boards
• Milk art
• Modern tin art
• Bottle cap murals
• Body tracings
• Grape and toothpick sculptures
• Leaf printing on fabric
• Air dry dough beads
• Shaving cream marbled paper
• Plaster of Paris sandcasts

Whichever lessons you choose to work on with your class, remember – exposing children to art is not just about teaching them how to recognize a Picasso. It is about exposing young minds to experiences that will change their view of art, and the world.

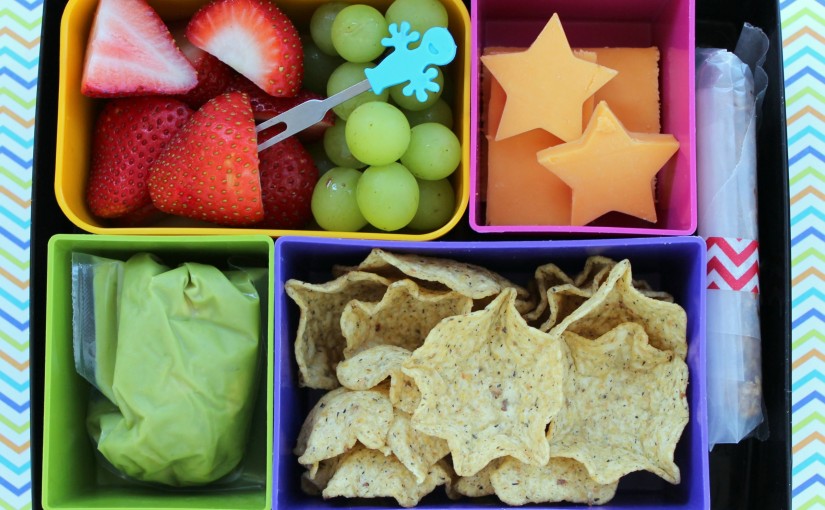
Fun & Healthy Lunchbox Ideas for Kids

Many studies have proven that children need to eat a nutritious breakfast in order to perform well at school, but what most parents don’t realise is that having a healthy, balanced lunch is just as important.

Children need a nutritious meal in the middle of the day to re-boost their concentration and give them the energy they need to power through the mid-afternoon slump and get the school day finished.


School Provided Food

Most schools regularly send home information about what food or meal plans are offered through the cafeteria. Look through the material with your children and plan on the days when your child will eat from the school’s menu, and what days he or she will take a packed lunch. If your child would like to purchase his or her lunch from a school vending machine, be sure to check that they stock healthy choices your child can choose from such as yoghurt, fresh fruit and water.


Packed Lunches

Providing a packed lunch for your child can be a fine balancing act. Parents who prepare their children’s lunches realise that they are playing an important role in their child’s diet, and overall health.

Studies have shown that children who are healthy and eat well balanced meals tend to out-perform those who do not, particularly in school. This means that it is important to ensure that each lunch is healthy and filling, providing an opportunity for your child to do their best at school.

A nutritionally balanced diet should contain a mixture of the following:


  • A filling, starchy food such as bread, rice, pasta
  • A food high in protein such as egg, meat or beans
  • One or two serves of fruit or vegetables
  • A low fat dairy item such as cheese of yoghurt


These items can be made fresh, or can even be made up from leftovers. Whatever you use, make sure you add variety – mot children do not enjoy eating the same things every day so play around with the following ideas and introduce them to some healthy new foods:

  • Carrot or celery sticks with hummus
  • Trail mixes
  • Wholegrain pretzel sticks with herbed cream cheese
  • Granola bars
  • Fruit salad
  • Cheese cubes
  • Fruit and nut quinoa
  • Beef jerky
  • Tapioca pudding
  • Fresh fruit and yoghurt
  • A few small squares of dark chocolate
  • Homemade sushi
  • Roasted chickpeas
  • Air popped popcorn
  • Sugar snap peas and sour cream dip
  • Fruit or vegetable kebabs
  • Pickles with tzatziki dip
  • Mini muffins
  • English muffin pizzas
  • Pasta salad
  • Unsweetened apple sauce
  • Hard boiled eggs
  • Apple slices with peanut butter
  • Mini pancakes with honey
  • Filled pita bread
  • Sliced bell pepper and salsa
  • Rice salad
  • Meat roll ups

These simple, healthy ideas will boost your child for an active afternoon and will fuel their bodies to support their learning.


If you are providing a packed lunch, be sure to also keep these tips in mind:

  • Always pack lunches the night before – that way you won’t be tempted to quickly add packets of processed foods because you are rushing.
  • Ensure that your child’s lunch box or bag is clearly named in case it gets lost.
  • Involve your kids in the lunch-making process. Having your child help you will help to teach them about making healthy choices and will increase the likelihood that they eat their lunch, since they helped put it together themselves.
  • Think about what packaging you will use. Most schools now prefer ‘rubbish-free’ lunches which means using small reusable containers. Just make sure they can open them independently, and that they are secure and won’t leak.
  • Don’t give into peer pressure. Children are masters at telling parents what the other children are having in their lunch. Only you know what is right for your child – go with your gut.
  • Be creative! Kids love tiny portions, fun shapes and variety! Experiment with cookie cutters, toothpicks and make sure the lunchbox contains a variety of color to keep them interested.

Backpack Safety

With the summer coming to a close, matters such as uniforms, stationery and bus routes are often at the top of any parents mind, as children everywhere start preparing for their return to school. However, one important piece of school equipment is commonly overlooked: the backpack.

While buying whichever backpack is in fashion, or the least expensive might be your first port of call, it is important to keep in mind what the best fit might be for a healthy backpack. Not all backpacks are created equal, and your child will wear whichever pack you choose every day, so it’s worth taking the time to ensure that you have chosen a backpack that will help your child to be comfortable and secure throughout the entire school day.

A backpack is an essential item that no school child can do without but according to the US Consumer Product Safety Commission, almost 28,000 injuries are treated in emergency rooms each year due to wearing backpacks. The following are our tips for ensuring that your child’s backpack is the best fit. A child wearing an inadequate backpack or wearing one incorrectly can lead to muscle strains, pain and fatigue.

Get your child started off on the right foot this school year by making sure they have the right backpack, and know how to wear it properly.


Buying

  • When buying a backpack, choose one with wide, padded straps and a padded back. The padding will provide additional support and stop the straps from digging into your child’s shoulders when the backpack is full
  • If the school allows it, consider purchasing a rolling backpack – this will give your child some respite from wearing it all the time if it contains a heavy load. Just make sure that the backpack fits into your child’s locker
  • Choose a backpack that is no wider or longer than your child’s torso. Have your child try the backpack on and check that it fits from around two inches below your child’s shoulder blades to their waist
  • Make sure your child can stand straight with the backpack on – if they lean forward when the backpack is on then it doesn’t fit them correctly
  • If you purchase a backpack online, make sure there is a return policy just in case it fits your child poorly and needs to be exchanged
  • Consider choosing a backpack with a hip belt – these help to relieve some of the weight, particularly taking it off the shoulders and neck
  • According to studies, almost 80 percent of school children think their bag is too heavy. Don’t purchase a larger bag, hoping it will last longer – buy a bag that is size appropriate for your child’s age
  • Take into account the weight of the bag before you buy it – canvas and cotton bags weigh less than leather
  • Make sure the backpack has a drink bottle holder on the outside to avoid spillage and consequent problems such as stains or mildew


Wearing

  • Don’t overload backpacks with unnecessary items. Make sure it has all the essentials but does not weight more than 10 to 20 percent of your child’s overall body weight.
  • If your child has a lot of heavy books to carry, encourage them to leave as much as they can in their locker or desk while at school, and leave any unnecessary items at home. If this is not possible, offset some of the weight by using a book bag which can be carried separately
  • Make good use of all the compartments in a backpack so that the weight is distributed as evenly as possible. Properly utilising compartments also makes it easier for kids to find the things they need quickly
  • If your child is carrying heavier items, make sure they are packed as close to the back as you can, in the center of the bag
  • Don’t allow your child to sling their backpack over one shoulder – both straps should be used to avoid straining muscles and causing poor posture


If you notice anything unusual about your child when they are wearing their backpack, check it. Changes in posture, pain, red markings, numbness or difficulty taking the bag off or on can all be signs that the backpack is too heavy or is inadequate.


Sorority Fundraising: A Five-Step Guide

Every sorority has different purposes and characteristics, but what they all have in common is philanthropy.

Philanthropy and community service is usually the foundation of most fraternities and sororities. Each year, chapters all over the United States raise millions of dollars for worthy causes, or for their own foundations. Sororities, in particular, are by their very nature, built upon the idea of charity, service and sisterhood. Fundraising is a crucial component of sorority membership and management and is a fantastic way to increase participation and enthusiasm on campus.

Here’s our 5-Step Guide to executing a successful fundraiser for your Sorority;

1. Fundraising Committee

Firstly, a fundraising sub-committee should be established within your group. This may be just two-three members or it may be 80% of the membership – that will be determined by how much interest, time and sisters there are to spare. No matter how many people the committee has, what’s important is that there is a group of interested volunteers who are willing to commit their time and effort into raising money.

Once these members have been established, have a discussion about what abilities and skills those members bring to the table. This will allow people to take on tasks that are most suited to their talents. You will need to make some decision about what roles are needed for the committee to host the event, and who is going to step into those roles.

One person will need to take on the role of the ‘administrator’. This person will be in charge of keeping the event cohesive, following up with committee members to ensure that tasks have been completed and taking care of any hitches that may arise. This ensures that there is at least one person who can see the ‘bigger picture’, while people are going about their tasks.


2. Choosing an Event

The most crucial decision to the success of the entire event is going to be choosing the right event. It’s important to keep your ideas fresh – nobody will leap at the chance to attend the exact same event as you held last year, or one similar to what the fraternity down the road held last month. Choose something original – uniqueness will attract much more attention!

Here are some ideas to get you started:

  • Casino Night
  • T-Shirts
  • Inspiring Women Night (with guest speakers)
  • Mardi Gras
  • Car Wash
  • Dance Marathon
  • Wristbands
  • Battle of the Bands
  • Sell Toilet Paper
  • Bingo Night

Getting sponsors is a fantastic way to cut down costs and increase the fundraising potential. Just be sure that any companies or products you are engaging with for the fundraiser are verified and safe, and make sure that you have checked any boxes you may need to with your college administration. You don’t want to get too far into the planning only to find out that you have forgotten to file the necessary paperwork.


3. Logistics

Now that you have your committee and your event established, some of the technical details must be set in place.

Think about the following:

  • What is the fundraising budget?
  • What is the fundraising goal?
  • What resources are needed, and what is available?
  • How long will the fundraiser last?
  • Who will perform which steps?
  • When will it take place?
  • What promotion will you use?
  • Who will be there on the day?

At this stage, each committee member needs to be delegated roles so they can move forward with carrying out their event responsibilities. Make sure that everyone is clear about what is needed, and is comfortable with doing the tasks they have been assigned.

Decide how the event communication will be managed. Will there be regular committee meetings or can it be done through email or a Facebook group? Make sure the administrator is clear about how he or she will communicate with all of the members, and how you will all be able to contact each other if needed.


4. Promotion

Now that there are some concrete details revolving around your event, you need to establish a plan for the event’s promotion.

In the busy planning stages of how the event will be run, it can be easy to forget that promotion is crucial. As with anything in life, you get out what you put in. You will need to ensure that there are some members of the fundraising committee who will be actively promoting the event.  The hours that are put into this will pay off.

Publicize your fundraising event as far in advance as possible. This allows people to save the date as well as generate excitement and word of mouth about the event itself. Be sure to include crucial details when promoting it such as where, when and what the cause is. Ensure that people know why your cause deserves to be supported, and what the benefits are to them (a cool new t-shirt, a great night out etc…)

The easiest and cheapest ways to spread the word are by telling people about your event. Create a Facebook and Twitter page and get posting the information as early as possible. Ask everyone in your networks to promote your event and hand out flyers for people to put on their dorm room doors and cars. Make an awesome video, upload it to YouTube and have everyone in your sorority share it around. You might even consider running a competition and sourcing a donated prize for the person who shares the video the most on social media.  If your event is interesting, you can even approach local press and ask if they would be interested in covering the event. This can be fantastic exposure for both the event and for your cause.

Remember: promotion is not the area in which to cut corners. You must promote the event with every resource available to you, in order to pull it off successfully.


5. The Day

On the day of the event, ensure that you have enough people present that everything is in place and organized. If possible, have one or two people there who don’t have any other responsibilities other than coming to the aid of any last minute disasters.

Be sure to thank each and every person who contributes, whether they be a volunteer or a ‘customer’ at the event – every dollar helps and contributions are valuable whether big or small. Be kind and smile to your donors as you let them know how valued their support is to the sorority and its philanthropic goals.

Lastly, have a great time! The planning and hard work that was put in by your sorority and volunteers all comes to fruition today. Enjoy engaging with people, and watching that hard work turn into dollars and cents for the causes that your sorority cares about. You did a great thing – now have some fun!


Tips For First Teachers

So you’ve graduated, and you’ve just landed your first teaching job – congratulations!

Being a first year teacher is hard going. You have new names to learn and a classroom of children and their parents to get to know, all while you are finding your feet in your new career. This list of tips will offer practical advice on ways to manage your students, work with parents, keep yourself organised and survive your first weeks in the classroom.

Just remember: experience is going to be the best way to establish your teaching career, so make sure you jump in, boots and all. You will learn more in your first month than you learnt in the years you went to college, but it doesn’t hurt to be prepared!


Organise

It is crucial that you be as organised as possible before you start, and that you maintain that organisation throughout the school year. Ensure that you have established an organisational system that works for you before your first day. A few minutes spent shuffling through papers can lead to chaos among your students so make sure you know where everything is, and you know exactly what is in store each day. When you arrive, put the day’s plans up on the board before class begins. That way, everyone is clear about where you are heading as the day progresses.

It is also crucial that your students are organised, and this is going to require some assistance from you. Don’t assume that they will know how to organise themselves – be clear and concise about how their books and folders should be organised, and what you want their work to look like.

Lastly, expect the unexpected, and plan for it. No day as a teacher will ever be the same, so make sure your organisation allows for unforeseen circumstances, which will arise every now and then. That way…it won’t throw your entire system off when the unexpected happens.


Plan

As well as being organised, you are going to need to become a planner. When it comes to teaching a full classroom, over planning is going to be the name of the game. For every hour of teaching time, make sure you have enough for two hours. The day and the lessons will go faster than you expect, and there’s nothing worse than those dreaded moments where you are not sure what to do next.

While you will not always need to spend so much time planning, you will need to take extra time to do this in your first year. Think of your first year in the teaching world as a sacrificial year – you will spend much more time planning and preparing this year than you will any other, because you haven’t written any lesson plans yet. Just make sure you hold onto anything you create in your planning – you will want to add to this and use it again in years to come.


Take Charge

Teaching is the one place where it’s not only acceptable, but necessary, to be a little bossy. Make sure that you are clear about what behaviour is appropriate in the classroom, and what is not acceptable. You also need to be clear about what the rewards and consequences are for students, and then you need to use as much follow through as you can possibly muster – empty threats will be the death of you. It is far easier to start out strict and loosen the rules later, than it is to try and rein in out-of-control behaviour later. Learn your school’s policies and procedures so that you know what the usual process is to follow, and then draw up a disciplinary plan. Never, ever allow students to ‘get away with it’. Your students need a teacher, not another friend.

In addition, be sure to inform parents of what is expected, and of the rewards and consequences. Send home a copy of the discipline plan, and ask parents to read through it with their children, clarifying anything they do not understand. This way you know that both parents and students know what is expected.

Above all, model the attitude and behaviours that you desire from your students. Monkey see….Monkey do.


Involve Parents

In addition to involving parents in matters of classroom discipline, be sure to involve them as much as you can, in every area of your teaching. The learning process needs to involved everyone – parental communication can make a significant difference in the education of a child. Make sure you keep parents up to date with their child’s progress, and how they can help to develop your child’s abilities and education at home.

Make sure you also keep in mind parental support when you are trying to organise projects. If you need items for a celebration, send a note home asking for donations. Most parents love to contribute, and if you don’t ask for the things you need, then they don’t have the opportunity to.


Make Friends 

Get to know the other teachers and become good friends with them – they will be priceless! This is going to be invaluable for your first year’s journey and its success. Taking advice and bouncing ideas around with your colleagues who are more experienced in teaching, and in the mechanics of the school, is going to help you find your way that little bit faster. Don’t be afraid to ask for help – most teachers are more than happy to share their experiences and tips for managing the classroom.

Just make sure that you do not try to be another teacher. Be unique –you will soon learn what works for you, and can adapt their advice to suit your teaching style.


Keep a Stash

Find a drawer, a shelf or a box and keep some essentials in it. You should include:

  • An over-the-counter painkiller for headaches
  • An extra set of clothing (you never know with children: paint, glue or vomit are all distinct possibilities)
  • A couple of power bars for days where you just didn’t get time to eat


No matter how organised you are, some days the score board will read Students: 20, Teacher: 0. You will inevitably make mistakes (and learn from them) and there will always be ‘those days’. Just remind yourself that tomorrow is a new day and a new chance to get better at this. Do your best, keep your chin up and try to have fun.

And remember to play the ‘rookie card’. You will only be a new teacher for the first year, so cut yourself some slack and forgive yourself for making mistakes. And if all else fails…fake it till you make it!


22 Fun Activities for Summer

We all know that the novelty of not going to school wears off after a few days, before the ‘bored’ whining sets in, so be prepared with some great ideas for outdoor activities to keep boredom at bay, and raise your children’s Vitamin D levels!

Outdoor activities don’t have to be expensive or elaborate. From nice messy projects that kids will love to get stuck into, to more structured projects that will produce something useful, you will be sure to find lots of fun in this imaginative list of activities kids will love! Make this summer the best ever by setting aside some time for outdoor lessons and activities that will provide great entertainment for the whole family.

Get the most out of this summer by…..


  1. Going on a Picnic

An oldie, but a goodie! Combining the simple pleasures of fresh air, sunshine and good food never seems to get old. Picnics are the perfect activity for those days when you just want to get away from the house and make an afternoon of it. Pack lots of heat tolerant finger foods and pick a spot that will provide a relaxed setting where the kids can play safely and the adults can unwind.


  1. Bug Hunting

Bug hunting is a fantastic way to connect kids to the natural world and is a great activity for days when you don’t want to leave the house. Exploring their own backyard will encourage inquisitiveness and imagination in your children and will keep them busy for hours! Grab some tweezers, a magnifying glass and some clean containers and set about seeing what you can find. A good place to start is by turning over rocks, and looking around the base of trees.


  1. Running Through a Sprinkler

Setting up a backyard sprinkler is a great way to cool the kids off without all the rigmarole of taking them to the pool. If you don’t have a sprinkler, poke some holes in a large soda bottle and tape it to the hose.


  1. Sun-Melting Crayons

Melting crayons and making a piece of artwork or new crayons is a great way to teach children about the power of the sun, as well as creating something new. To make a piece of artwork, lay some crayon pieces on a piece of tinfoil or canvas, and let the sun do the rest. To make new crayons, lay some cookie cutters on a piece of tin foil and fill with crayon pieces.  Once the sun has done its job turning the solid pieces to liquid, bring the whole thing inside to cool and set.


  1. Making a Water Table

Water tables are a deceptively simple way of keeping the kids entertained for hours, and the water that will inevitably get splashed everywhere, will also keep them cool in the summer heat. Change things up by using cold water, warm water, ice, adding a squirt of detergent for bubbles or even food coloring. The best part is that in the winter months you can transform the table by filling it with sand or dried beans and keep the fun going all year round!


  1. Painting Rocks

This is a simple but fantastic activity because it teaches your children about art as well as geology. Clean the rocks first and let them dry completely, then outline the design in marker before getting creative with paint! Seal the rock with a 50/50 mix of water and white glue and you’re done! These also make excellent paper-weight gifts for grandparents and teachers!


  1. Washing the Car

Kids love this, and adults do too – because it gets the car clean! Let the kids fill the buckets with water and soap, and get them to do the pre-rinse with the hose. Brush any bugs or tar off yourself before they start, and then let them get crazy with the lathering! Once you’ve done the final rinse, make sure you ‘accidentally’ rinse the kids a bit as well…they’ll love it!


  1. Going Foraging

Foraging is a great way to teach children about where food comes from, as well as using surplus resources in your area. Take a walk around your neighbourhood and see if you can spot fruiting trees that need some relief, or go a bit more ‘bush’ and look for things like chickweed, watercress and nettles. Just be sure you do your homework first!


  1. Slipping ‘n’ Sliding

Easy to create, and fun for the whole family, the quintessential slip ‘n’ slide is a must have for this summer’s calendar. Put down a tarpaulin, or some painter’s plastic on a piece of backyard that offers a slight gradient, and let the fun begin! Hang the hose over a tree branch or the clothesline for ‘hands-free’ convenience and be sure to use some inexpensive dish detergent to get just the right amount of ‘slip’.


  1. Creating a Stepping Stone for Your Garden

A quick search of this will bring up some great ways you can create these using easy mix concrete and moulds but the easiest way by far is to go and buy some cheap pavers (you can even find them free on places like Craiglist) and paint them up with some exterior paint. Give the kids one each to decorate and create a beautiful path through your garden, that will add character and charm to any yard.


  1. Going Hiking

This can be done with children of all ages, but takes a bit of preparation, and a lot of patience. Be sure to start with short distances, and be willing to travel at the pace of the youngest in the family. Take plenty of snacks, don’t go too far from home and remember – hiking doesn’t have to be in the woods. Try hiking around your city, taking in the sites and the atmosphere!


  1. Coloring the Driveway or Patio

Sidewalk chalk is a great activity for those days when you might not have the energy yourself for a vigorous activity. Get the kids to trace each other’s body outlines, play tic tac toe, or design them a hopscotch or foursquare grid. Once they’ve done those, let them get creative and produce the most colourful artwork they can. If you don’t have any chalk you can create the same effect by making your own paint using water, food coloring and corn-starch. Be sure to take photos before the rain has a chance to was it all away!


  1. Playing Catch

Old-fashioned fun still has a place on our list! Get out there with your children, the dog and a ball (or water-filled balloons!) and waste the afternoon away.


  1. Participating in a Mini Olympics

Get everyone up, outside and moving by hosting an Olympics Game in your own yard! Plan a variety of challenges and make sure you work to everybody’s strengths so that everyone will have a chance at a medal. To make it more educational, ask your children to select a country to represent and have them make a flag to use in the parade. Make your own medals or pick some up at a dollar store, and award them at the end of the day.


  1. Going on a Nature Scavenger Hunt

This one is as fun to plan as it is to carry out. Draw up a checklist for your children to complete, ticking off each one as they have gathered the item. Keep items simple, using things like ‘two yellow flowers’, ‘a small rock’ and ‘a feather’. Have a ‘prize’ for the first person to complete the scavenger hunt with all the correct items, then spend the afternoon talking about the objects, feeling the textures and looking at what makes them unique.


  1. Making Homemade Bird Feeders

Fill your garden with birds this summer by inviting them in for a meal. Use whatever you have around the house – pinecones, old teacups or even cut oranges in half and scoop the rind out before filling them with seed. The birds will appreciate the snack as they pass through your garden, and the kids will enjoy watching them!


  1. Reading Books Outside

Get some extra Vitamin D by taking reading time outside. If it’s too hot you can sit in the shade, and you may even want to grab some nature books and talk about the things you see around you.


  1. Having a Water Fight

No matter how old one gets, if the weather is hot enough, water fights always seem like a good idea. Grab whatever you can find and get the kids wet. In fact, the wetter, the better! So grab your sponges, water guns or just set the hose on the kids and watch them run.


  1. Starting a Garden

Plant learning in the minds of your children this summer. It’s good for kids to learn that food comes from the ground, rather than the store, and there’s no better way to teach them than to start your own garden. Involve your children as much as you can – give them a space in the garden or a pot to call their own, offer them a choice in plants, and show them how to weed, water and collect seeds at the end of the season. The lessons learnt over a garden will foster a life-long love of growing and cultivating their own food.


  1. Running a Lemonade Stand

Lemonade stands take a bit of advance planning, but are a fantastic way to teach kids about earning money. Be sure to plan out the day in advance including what ingredients you will need, where the best location will be (think hot playgrounds, sports fields or in your front yard), what flyers or announcements you might want and when you will make the lemonade. Once the plan is in place enlist your children to help make a sign with a clearly visible price, and you’re in business!


  1. Making Wind Chimes

DIY wind chimes are a simple but fun activity that can be done indoors or out, and can be done with materials found around the home. Try using old cutlery, keys, beads or bottle caps. If you have time, you could even take the kids to the beach to collect sea shells and driftwood for a seaside themed wind chime.


  1. Playing Parachute

Even summer has the occasional rainy day, or lazy day where you just don’t want to venture outside. This makes the perfect occasion for playing ‘parachute’ like they do in elementary school. Grab a large sheet, move the furniture back in the living room and play some mini games – try getting the kids to throw cottonballs onto the parachute and watching them bounce when the parachute is shaken, or play ‘tag’ by calling out two names and having the children swap places while the sheet is in the air.